If you are like me, then you probably don’t like working on the command line if other options are available. I don’t begrudge developers who work in Terminal all day, but my skill set doesn’t extend to the command line. So, the question becomes: How do I use progressive tools like Sass without touching the command line?
What is Sass
Sass is a preprocessing language that gets translated into CSS. Sass offers a great deal of functionality missing from vanilla CSS, like functions, mixins, and variables. It is more terse than CSS and generally improves the maintainability of a site. Sass isn’t the only game in town, either. Other preprocessed languages like LESS offer similar features, but don’t have quite the same following.
Sass is emerging as the clear leader in preprocessors, so we are going to focus on it. Now back to our first question: How do I use Sass without touching the command line?
What is CodeKit
CodeKit is a GUI interface for dealing with Sass, Less, Stylus, Jade, Haml, CoffeeScript, Javascript and Compass. Instead of setting up these tools through the command line, we just install CodeKit and point it at the files that we want to compile. It then watches those files and recompiles every time we make a change.
Setup is a breeze and getting it to watch a group of files is incredibly easy, so it won’t take us long to get you up and running.
Getting CodeKit Up and Running
Sadly, CodeKit is a Mac only app. You can get it at incident57.com/codekit. It’s only $25, though you have the option to pay more if you really want to contribute to the project. So, just buy it and install as you would any normal Mac app.
When you buy CodeKit, you’ll receive a really long serial number. To activate your license, you need to enter it into CodeKit along with your e-mail address. To do so, Select Register CodeKit from the CodeKit drop down menu. Enter your email address and copy the Serial number into their respective fields and click Unlock. You should be good to go!
Compiling With CodeKit
Now that we’ve got CodeKit installed, lets test out the magic! To see how CodeKit works with projects, we’ll create a mock website. We’ll just set up a couple files and directories, so that we can see how CodeKit does it’s thing.

On your desktop, create a folder called codekit_test. Inside that folder create an index.html file and a folder called scss. Now, inside the scss folder, create a file called style.scss. The names of these folders and files don’t really matter to CodeKit, but are pretty standard. If you use a different directory structure, don’t sweat it. CodeKit allows you to organize things any way you want.
Create the Index Page
Crack open your favorite text editor (I like SublimeText 2) and add this bit of code to the index.html file:
[html]
<html>
<head>
<link rel=’stylesheet’ href=’css/style.css’ />
</head>
<body>
<section>
<h1>Sass is Awesome!</h1>
<p>Who knew you could do so <em>much with</em> so little! Let me count the ways:</p>
</section>
</body>
</html>
[/html]
Now, we have a bit of HTML to style.
If you are paying attention, you might have noticed something a little odd about the link href. We are linking to a CSS file that doesn’t exist! Don’t worry, it’s not a problem. CodeKit is going to take care of that for us, so don’t worry your pretty little head.
Tell CodeKit to Watch a File

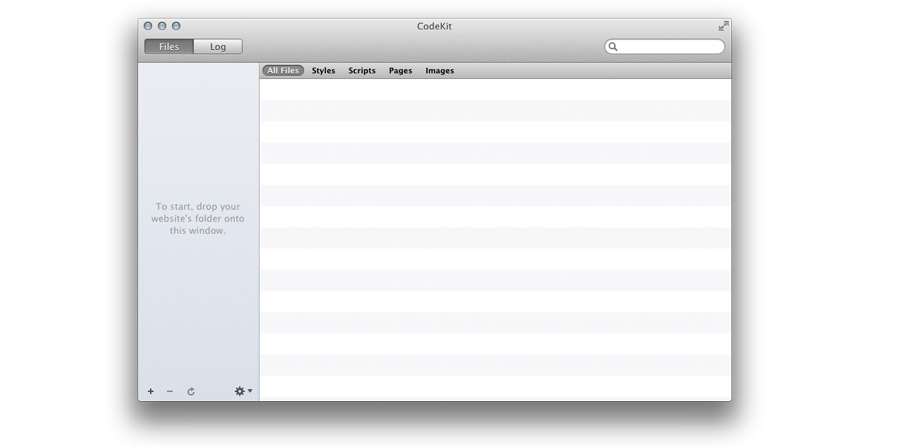
Getting CodeKit to watch a file is easy-peasy. The first time that you open CodeKit, you’ll notice that the lefthand sidebar tells you what to do: To start, drop your website’s folder onto this window.
It really is that simple, too. All we have to do is drop the entire codekit_test folder onto the sidebar and CodeKit will search all of the enclosed folders for files that it can watch. Now, whenever we make changes to either style.scss or index.html, CodeKit will know and act accordingly.
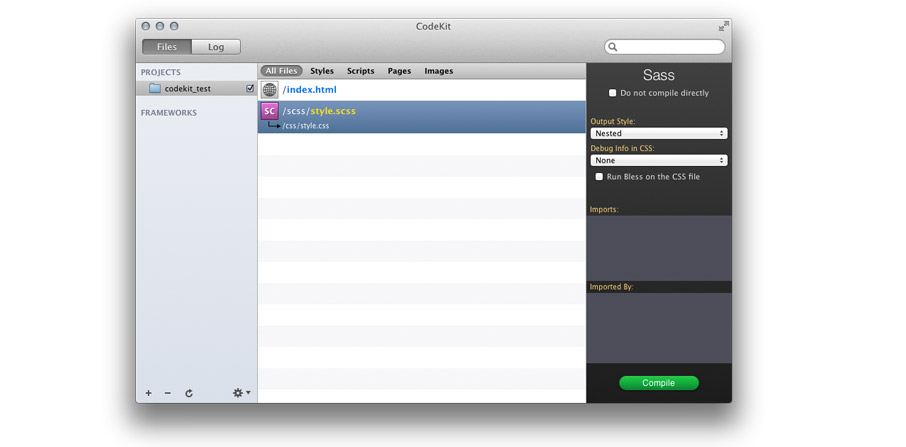
After you drop your codekit_test folder into CodeKit, you’ll notice that in the lefthand sidebar, under PROJECTS, you’ll see codekit_test with a checked box beside it. The checkmark means that CodeKit is currently watching that folder for changes. If you want CodeKit to stop watching codekit_test, just uncheck the box.

You’ll also notice that the CodeKit’s center pane now lists both the index.html and style.scss files, including their paths from the root folder (codekit_test). This is a list of all the files that CodeKit is aware of in the current project.Above the list of files, you’ll see all the ways that you can filter the list (All files, styles, scripts, etc.).
Now, select /scss/style.scss from the list. A dropdown will appear with a small hooked arrow and a file path directory. You should see /css/style.css. This is where CodeKit will put the CSS file that it compiles from our Sass file. What this is saying is that when we make a change to our style.scss file, CodeKit will look in the /css folder for a file called style.css. If it finds the file, it will overwrite the file’s contents with the CSS it compiled from style.scss. If the file doesn’t exist, it will create the file, so we don’t even have to create the CSS file, we just need to compile our Sass and CodeKit will generate it for us!
Compiling our Sass
Go ahead and open your index.html file in your browser of choice. Granted, it’s nothing sexy, but it’s not getting any styling yet, either. Lets dress it up!
Now, for the fun part. Open style.scss in your text editor and add this:
[css]
$grey: #ccc;
body{
background: $grey;
font: 100%/1.6 Helvetica, Arial, sans-serif;
padding-top: 30px;
}
section{
background: white;
width: 500px;
padding: 30px;
margin: 0 auto;
box-shadow: 0 0 10px rgba(0,0,0, .3);
border-radius: 10px;
h1{
color: green;
font-size: 2em;
line-height: 1em;
margin: 0;
font-weight: bold;
}
p{
font-size: 1em;
line-height: 1.6em;
margin-bottom: 0;
em{
font-weight: bold;
}
}
}
[/css]
Now, save the file. If yo don’t understand everything in the Sass file, thats fine. I just want you to see how Sass gets compiled into CSS. I know it’s a little automagical, but for now, lets focus on CodeKit.
When you save, CodeKit will do two things: It will generate the CSS file and it will automatically update the browser. This happens every time you update the index.html file, as well. Make a few changes to the Sass file and save; you’ll instantly see you changes in to browser window. Also, take a look at the CSS file that was generated. You’ll see how CodeKit formats the document (You can adjust this) and how the Sass gets translated into CSS. Very nice.
Other Nice Tidbits
In CodeKit, the right sidebar allows you to set some simple options about how your CSS file is compiled. Output Style lets you choose the way that your CSS looks when its compiled. I use Expanded during development and Compressed for deployment. Debug info in CSS determines what shows up in the Log view whenever CodeKit encounters a compilation error (usually the product of bad markup, dropped semicolons, and the like).
Whats Next
Now that you’ve got the basics, stay tuned! Our next Sass article will be about the basics of the language and how to use it.
Go forth and code.


Great article!
Thank you for this 😀
The BEST turorial for those doing their first step into Sass and Codekit. Looking forward to more..plz