
If you design websites and/or web apps, there’s a good chance that you also write at least some of the front end code to execute your designs (HTML, SASS, JS, etc.). If you haven’t already, you’ll soon have to jump into the command line to run projects that you’re working on.
For anyone who’s new to the command line, starting from scratch can cause the kind of intense fears and paranoia typically reserved for found footage horror films and clown conventions. But worry not. Once you know a few key commands, you’ll be up and running in no time like a true Bash champion.
Why is it called Bash?
There are a lot of terms floating around that you’ve probably seen or heard like the command line, Terminal, Bash, shell: What are all of these? They all refer to basically the same thing, but here’s a breakdown so you can get down with the lingo:
Command Line: this is just an interface where you control the computer through text commands
Shell: A Unix shell is the program that executes commands that are entered through a command line interface (CLI)
Bash: A shell and command language that’s the default shell on OS X and Linux.
Terminal: The program on OS X to run Bash.
Why use the command line?
Although it can be intimidating at first, using the command line opens up a lot of powerful tools to help you speed up web development. A few use cases you might come across are:
Running development environments locally. Front end Javascript frameworks like Ember, Angular, and React require dependencies and Bash commands to run locally
Using task runners and other development tools. There are plenty of tools to speed up and improve the quality of web development, like SASS, LiveReload, and Autoprefixer that require Bash commands to run.
Using CLI tools and utilities. There are some pretty powerful tools that do things like convert images to gifs
Setting up a server. If you ever want to host a website yourself, and you’re not using something like Squarespace, you may have to venture into the dark, developer filled world of the command line.
Getting started
To get started with Bash, open Terminal on your Mac. you should see something like this:
Austin-Prices-MacBook-Pro:~ Austin$
(If you’re not using a Mac, sorry this tutorial isn’t for you. Leave a comment below telling me why Microsoft machines are better and you are superior to me in every way.)
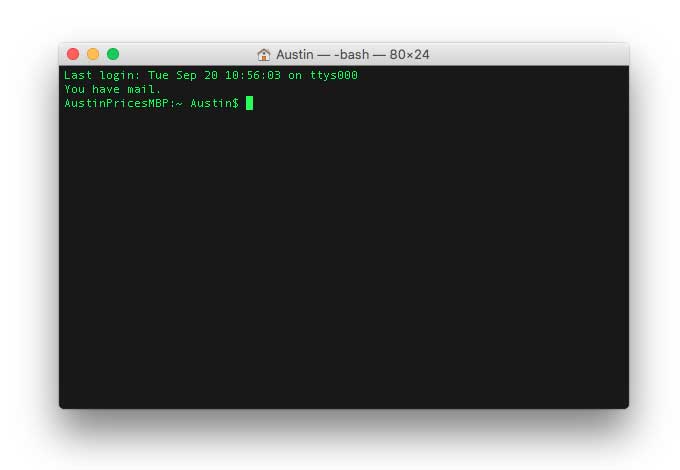
Homebrew: The only true theme for Terminal.
This means there’s no task running and you’re good to get started. Well, you’re almost good to get started. If you’re going to be running commands, you have to look like you know what you’re doing. In the application menu (at the top), go to Terminal > Preferences. Then select the Homebrew theme on the side of the window and click “Default” at the bottom. Now open a new shell window and you’ll like a true command line wrangler.
First, let’s look at some simple commands to help you navigate through your documents.
Change folder
cd [Directory]
Use this command to move around between folders, or directories, on your computer. For instance, if you wanted to go into the directory for a new project you just set up, you would use:
cd documents/projects/new-project
If a folder name has spaces, put the name inside quotes.
cd documents/projects/’new project’
Use a “~” at any time to navigate from the Home directory.
cd ~/documents/projects/new-project
Use two dots, “..” to move up one directory. So navigating from documents/projects/new-project to documents/project:
cd ..
Show contents of the current directory
ls
Running ls will show you a list of all the files and folders inside the current directory. So if you’re in documents/projects and you run ls, you might see:
Austin-Prices-MacBook-Pro:~ Austin$ ls
old-project
New-project
Make a new directory
mkdir [Directory Name]
Use this to make a new folder. Running the following command would create a new folder called “new-project”.
mkdir new-project
Open a file
open [File Name]
Use this to open a file. So to open index.html:
open index.html
Now you’re navigating with the command line like a champ! The fun is just beginning though.
Stopping a program
Control + c
If you’ve started to run a program and want to stop it, hold the Control button and press “C”. This will stop the program and allow you to enter more commands. It will show up in the command line as “^C”.
Global packages and package managers
Every project will have some local packages you need to install for that specific environment, but there are other packages, like Sass, that you’ll need to install globally. I’ll focus on the basics for now that you’ll need to install further global packages.
Homebrew
Homebrew describes itself as installing “the missing package manager for OS X [and Mac OS].” Once you install Homebrew, you can use it to install a ton of other packages you might need down the road. The install command is pretty long, so copy and paste is the way to go here:
/usr/bin/ruby -e "$(curl -fsSL https://raw.githubusercontent.com/Homebrew/install/master/install)"
You can also go to Homebrew’s website to learn a little more about it.
Ruby
Ruby is programming language that comes with another package manager that allows you to install more packages. Soon enough, you’ll be rivaling Amazon with all the packages you’re handling. Since you just installed Homebrew, you can use that to install Ruby.
brew install ruby
Now that Ruby’s installed, we can install Sass. You’ll need this to compile all of those scss files into a nice css file for your project. We’ll use ruby to install Sass, which is a Ruby gem (it’s just a package but with better branding).
gem install sass
Node
Node.js is a “Javascript runtime environment”, which basically means it allows you to run and compile Javascript code on your computer without using a web browser. You’ll need this installed for two reasons: First, you’ll need to be compiling and running Javascript to run a front end Javascript framework. Second, Node has a package manager called npm that happens to have the biggest collection of packages in Internetland. Pretty much every project you work on will make use of at least some npm packages, which can help with anything from adding a dollar sign to your currency inputs to automatically refreshing your browser when you update files. You can use Homebrew to install Node pretty easily.
brew install node
Setting up local development environments
If you’re building a web app with a front end Javascript framework, like Ember or Angular, you’ll need to set up your local development environment before you can run the project locally. We typically use Ember for our web app projects, so I’ll use that as an example project. If the frontend dev on the project is any good, they’ll have a nice README.md that’ll tell you the right commands to use.
Package managers and dependencies
Many web projects make use of add-ons or dependencies that help with anything from formatting to text to user authentication. These dependencies typically aren’t stored in source control. Instead, files that list all necessary packages are stored with the project and you just need to install them locally. You’ve already got setup with the two most common package managers, npm and bower, so all you need to do is run these two commands (one at a time):
npm install
bower install
Those commands will install all of the Bower and npm packages your project needs. Sometimes, you’ll run into permissions issues when running npm install. If that’s the case, simply run:
sudo npm install
Sudo gives super user permissions and will usually be able to overcome any permissions issues you have when installing
npm packages.
Running the project
Once you’ve gotten the project setup and installed all of the packages, you’re ready to get it running locally. Depending on the type of project and the dev environment, these commands will vary.
We use Ember for most of our web app projects, so we use Ember CLI to run projects.
ember server
Other frameworks like Angular and React use npm CLI.
npm start
Some projects, especially more websites, use task runners like Gulp and Grunt to run projects. These are up to whoever created the gulpfile.js or gruntfile.js for the project, but will be something like:
gulp dev
gulp server
grunt dev
grunt server
No turning back
The deeper you get into the command line world, the more you’ll use Ruby gems and Homebrew packages to speed up your workflow and run projects. Bash can be a beautiful, wonderful thing and is less intimidating than it seems. So don’t be bashful, jump right in. Pretty soon you’ll learn to love the command line as much as it loves you.


0 Comments